March 2025 Wrap-Up
Starting Seeds
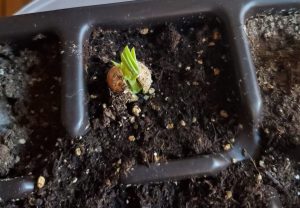
 March is a good time to start seeds. So, the cool-weather crops were started in early March 2025 while the tomatoes were planted toward the end of the month. Lettuce, kale, spinach and Swiss chard make up most of the plants. Six different tomato varieties were planted. The Genuine Heirloom Marriage Hybrid tomatoes took longer to emerge, and the germination rate was about half. But the seeds were from 2023. Viability decreases over time.
Additionally, repairs were made to the raised rows in the Big Garden. Early March brought tropical storm and even Cat. One winds to the Great Plains. Dust storms still exist in this part of the country in the early spring. Fortunately, by the end of the month the wheat stands turned green and helped mitigate the dirt-filled air. Hopefully, April will bring rain.


 My sampler quilt blocks are still just blocks. My review of the original and updated version of

")
")
")
")
")
")
")


")
")
")
")


")


")


 Spring is officially here by the calendar. The weather outside sometimes agrees. We have enjoyed some warm afternoons the last few days on the high plains. But this season is unpredictable and there are several chances for snow over the next ten days.

 The old wallpaper is history. A mixture of warm water and vinegar in equal parts aids in the peeling. I found spraying the wall with the mixture and waiting just a few minutes helped a lot. The timing is important though. After ten minutes, the paper was almost dry. (I live in a very dry climate.) So it is important to treat small areas at a time. I used about two quarts of vinegar in the process.
 After that was completed, I coated the wall with KILZ 2 acrylic. I plan to use a mixed tile design here that I am quite excited about. Additional pictures will be forthcoming.
 I am currently hand quilting the


 Back in the late 1980’s when I started quilting, one of the first books I bought was Diana Leone’s The Sampler Quilt. This was a how-to book building on an earlier pattern book. Later, Leone released The New Sampler Quilt.
 We are about halfway through the fall season. Much of the time it feels more like winter. However, we still have some afternoons that are enjoyable without jackets. The changing weather means it is time for changing gears with respect to hobbies. The garden has been put to bed and the quilt room is now the focus of activity.
 My community holds book sales twice a year. I try not to miss these sales. Each book sale benefits the local library. Naturally the books come from a wide range of sources. Many people buy books and then donate them. Some are even current releases.

