August 2024 Wrap-Up
Superb End of Summer
 Some months race through and others, like August 2024 linger, allowing one to savor the end of summer. So many hot days punctured by thunderstorms giving respite from the sizzle. County fairs, all day canning sessions, and refinishing furniture wound through the month. And the highlights, relatively cool days in Castle Rock, Colorado watching the BMW Championship professional golf tournament and attendance at a beautiful wedding just down the interstate at the beautiful Broadmoor resort in Colorado Springs.
Some great reading, visiting with friends and family and finishing a baby quilt all added to a sense of non-stress summer accomplishments. One could wish all months were like August 2024. Certainly, it was a month of productivity. But there was more. Perhaps, it was a concerted effort to unplug from national politics. Two full months remain before the election. Plenty of time to study candidates and ballot issues.
Or maybe because August 2024 allowed me to see three of my four offspring. Family is important. No matter the reason, the past month was quite enjoyable.
Reading and Writing
Summers during my childhood were filled with ocean swims, biking up and down the Daytona Beach peninsula and hours of reading every day. Now, I have many other activities to fit in as well and of course no beach a block away. The time spent in Castle Rock and Colorado Springs offers a replacement for the Atlantic. I could see myself living full time in the Rockies—someday. Hiking and biking and the smell of pines after a rain connect me to the earth as much as salty breezes and cries of seagulls.
Book reviews flow best just after finishing the last chapter. However, sometimes the final page comes just after midnight. This is why my review of The Women has not posted. I am struggling to express the depth of Kristen Hannah’s writing on a topic so close to my heart. The 1970s was not a good time to be an Army Brat.

In the Garden
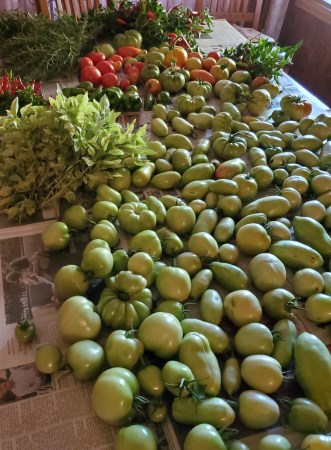
 August 2024 outshines last year in the garden. While the tomatoes are not a banner crop, they are a good amount. Cantaloupe are sweet and prolific as are jalapeños. The last week of the month the serrano pepper bush finally flowered, so barring an early freeze, September will offer even more peppers. Green beans are flowering as well. Plus, the two slips of sweet potatoes are thriving.
Cucumbers are eaten fresh and pickled. And onions are still abundant. I have let some of the salad greens go to seed and will begin collecting that seed soon for next year’s use. I encourage everyone to grow at least a small garden. Even apartments can have a few pots of herbs, lettuces or perhaps green onions.

 As a parent, I stressed the importance of reading and thus books. Bookshelf wealth is now a thing, but our house has always had a plethora of books. Children’s books, cook books, gardening books, novels and how-to books and many, many text books fill a multitude of bookshelves.

 8 oz. Cream Cheese


 Twist shut and secure by tying string around the top. Combine vinegar and sugar in a non-reactive stock pot. Add bouquet garni and bring to a boil. Remove the bouquet garni then add vegetables and return to the boiling point. Immediately remove from heat and pour into hot, sterilized jars. Add lids and bands and then process in a water bath for ten minutes. Add appropriate time if you live at altitude.
 Swiss Chard with Raisins and Almonds Recipe


 Spring is officially here by the calendar. The weather outside sometimes agrees. We have enjoyed some warm afternoons the last few days on the high plains. But this season is unpredictable and there are several chances for snow over the next ten days.